如何使用源码
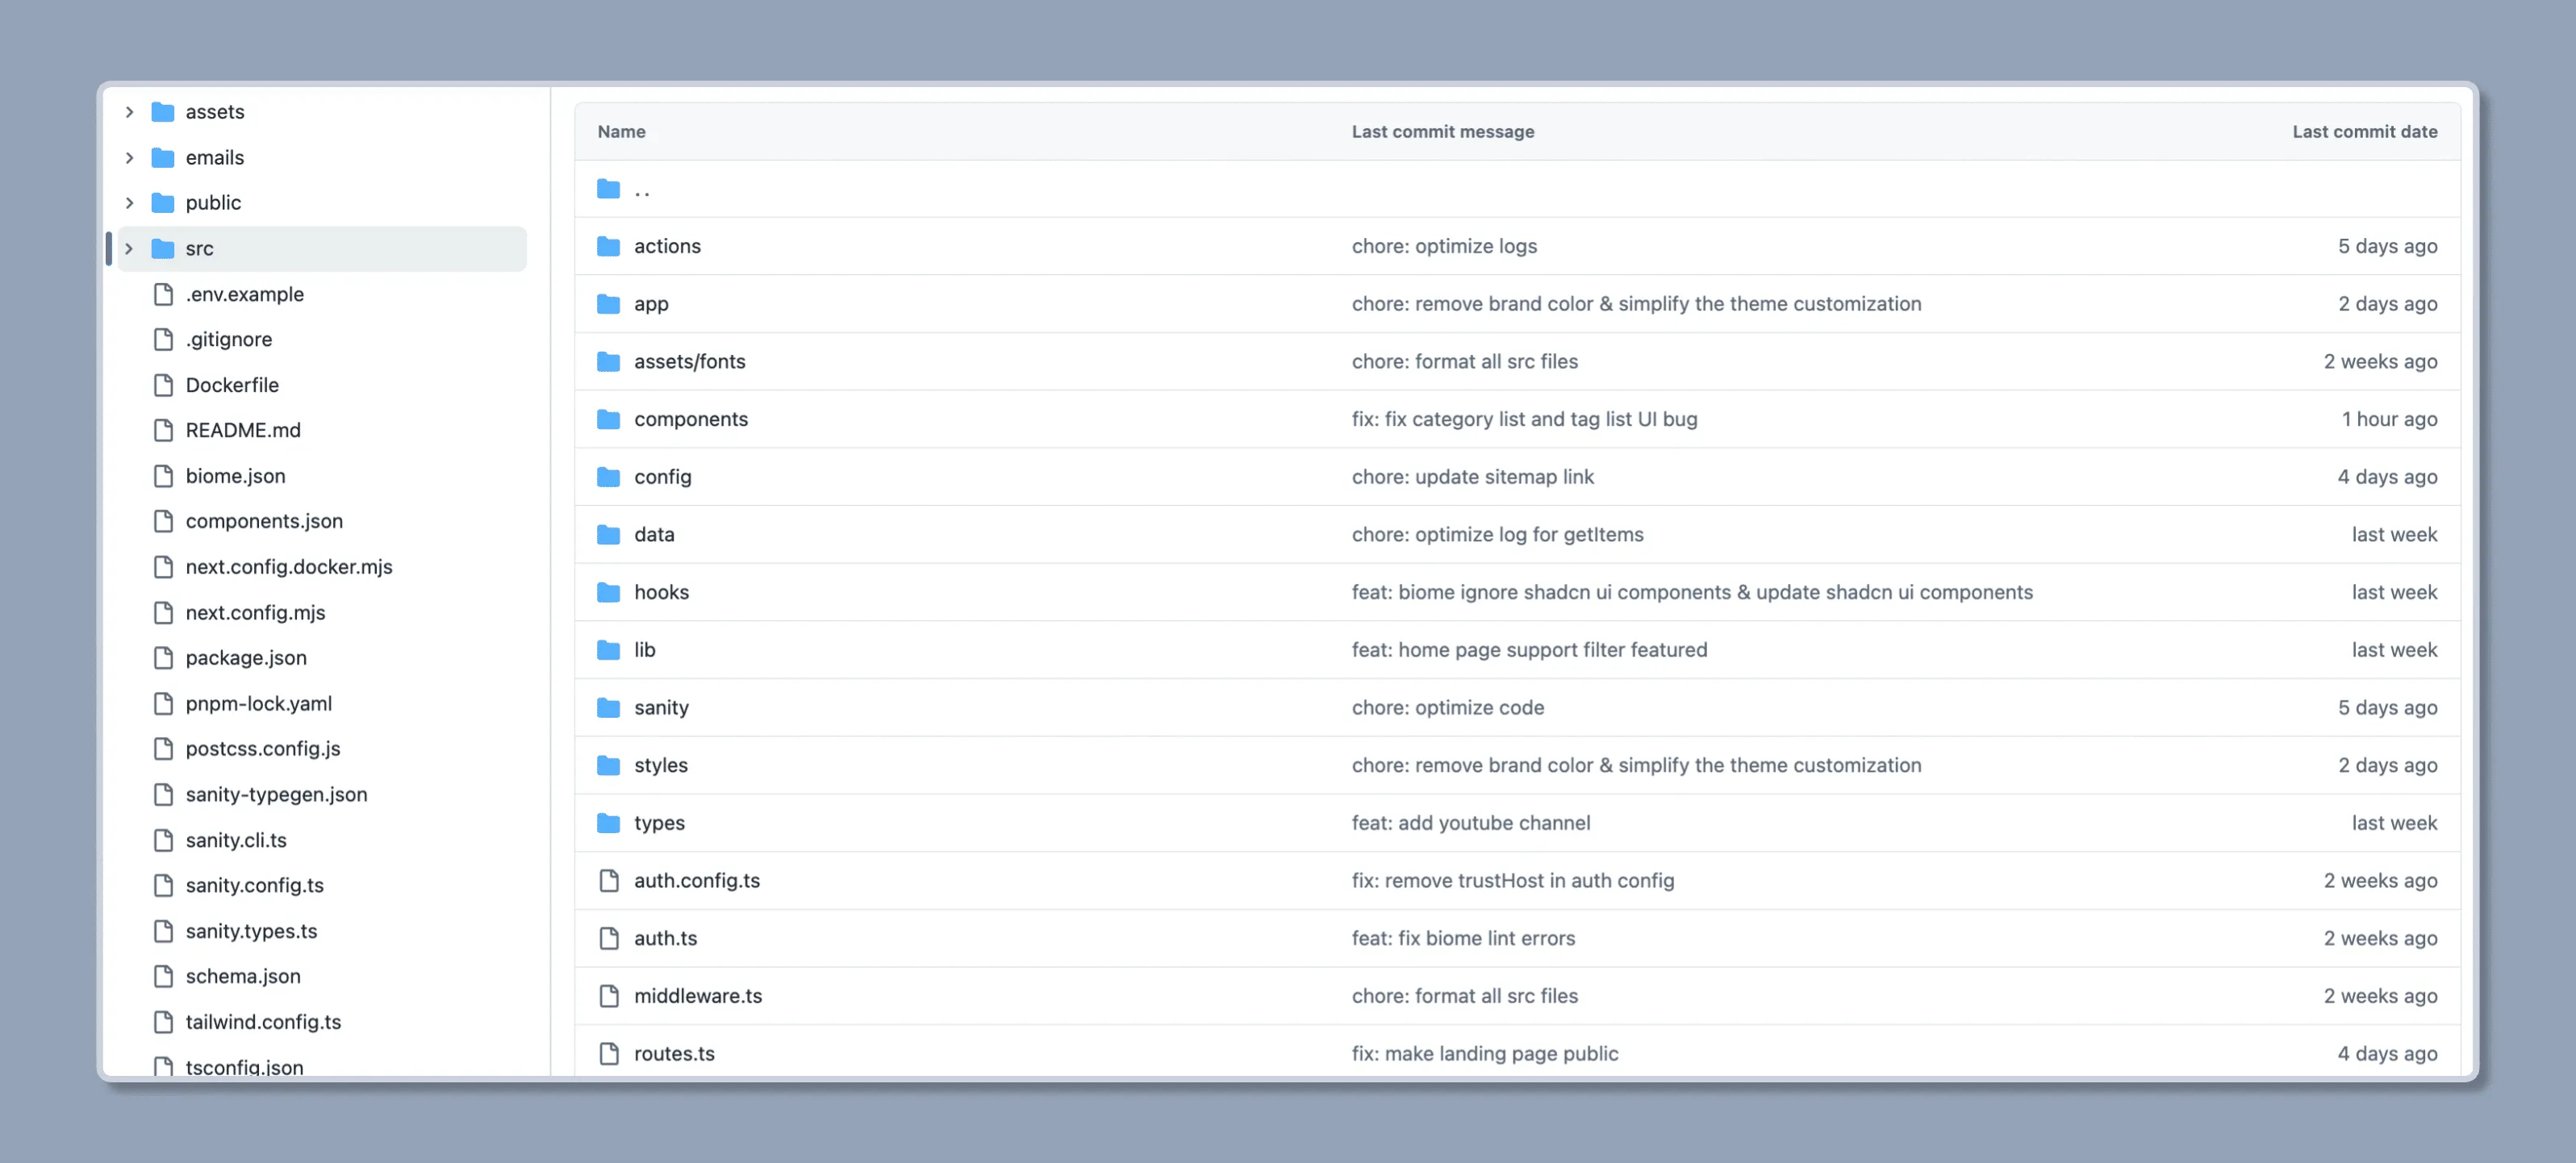
文件结构
Mkdirs 是一个使用 Typescript 语言开发的 Next.js 项目,因此 Mkdirs 的文件结构如下:
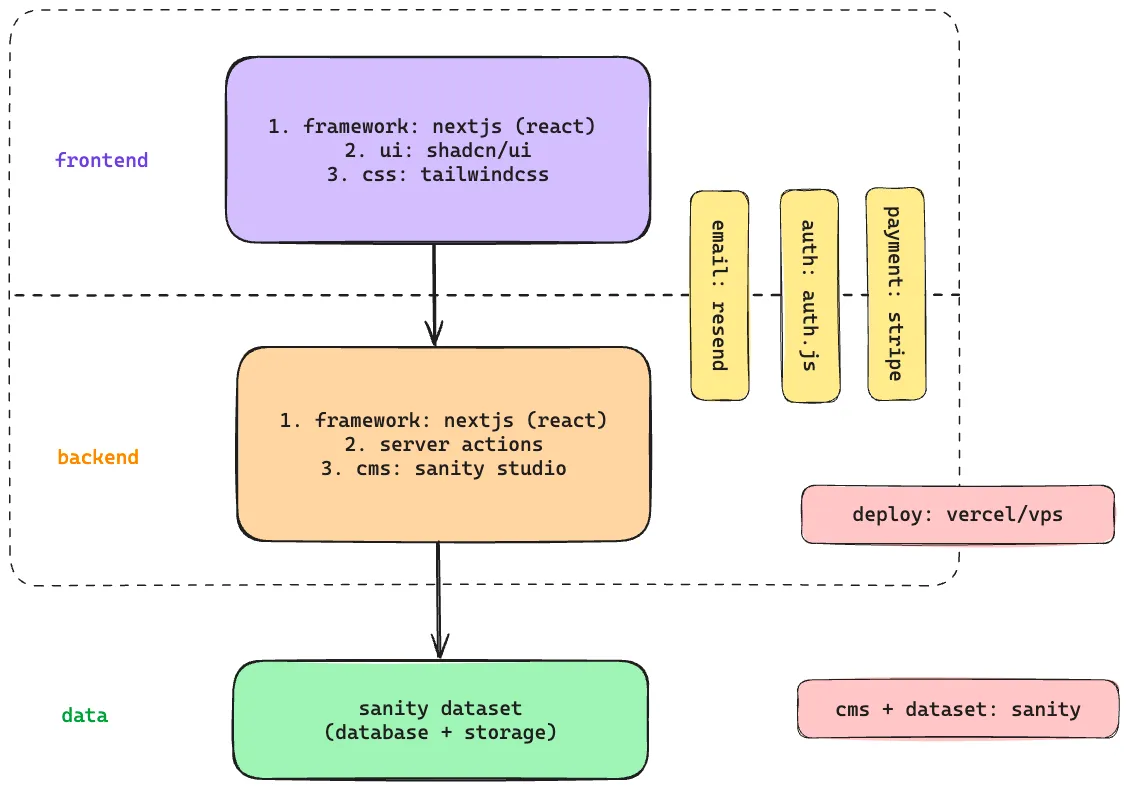
应用架构
如何查找日志
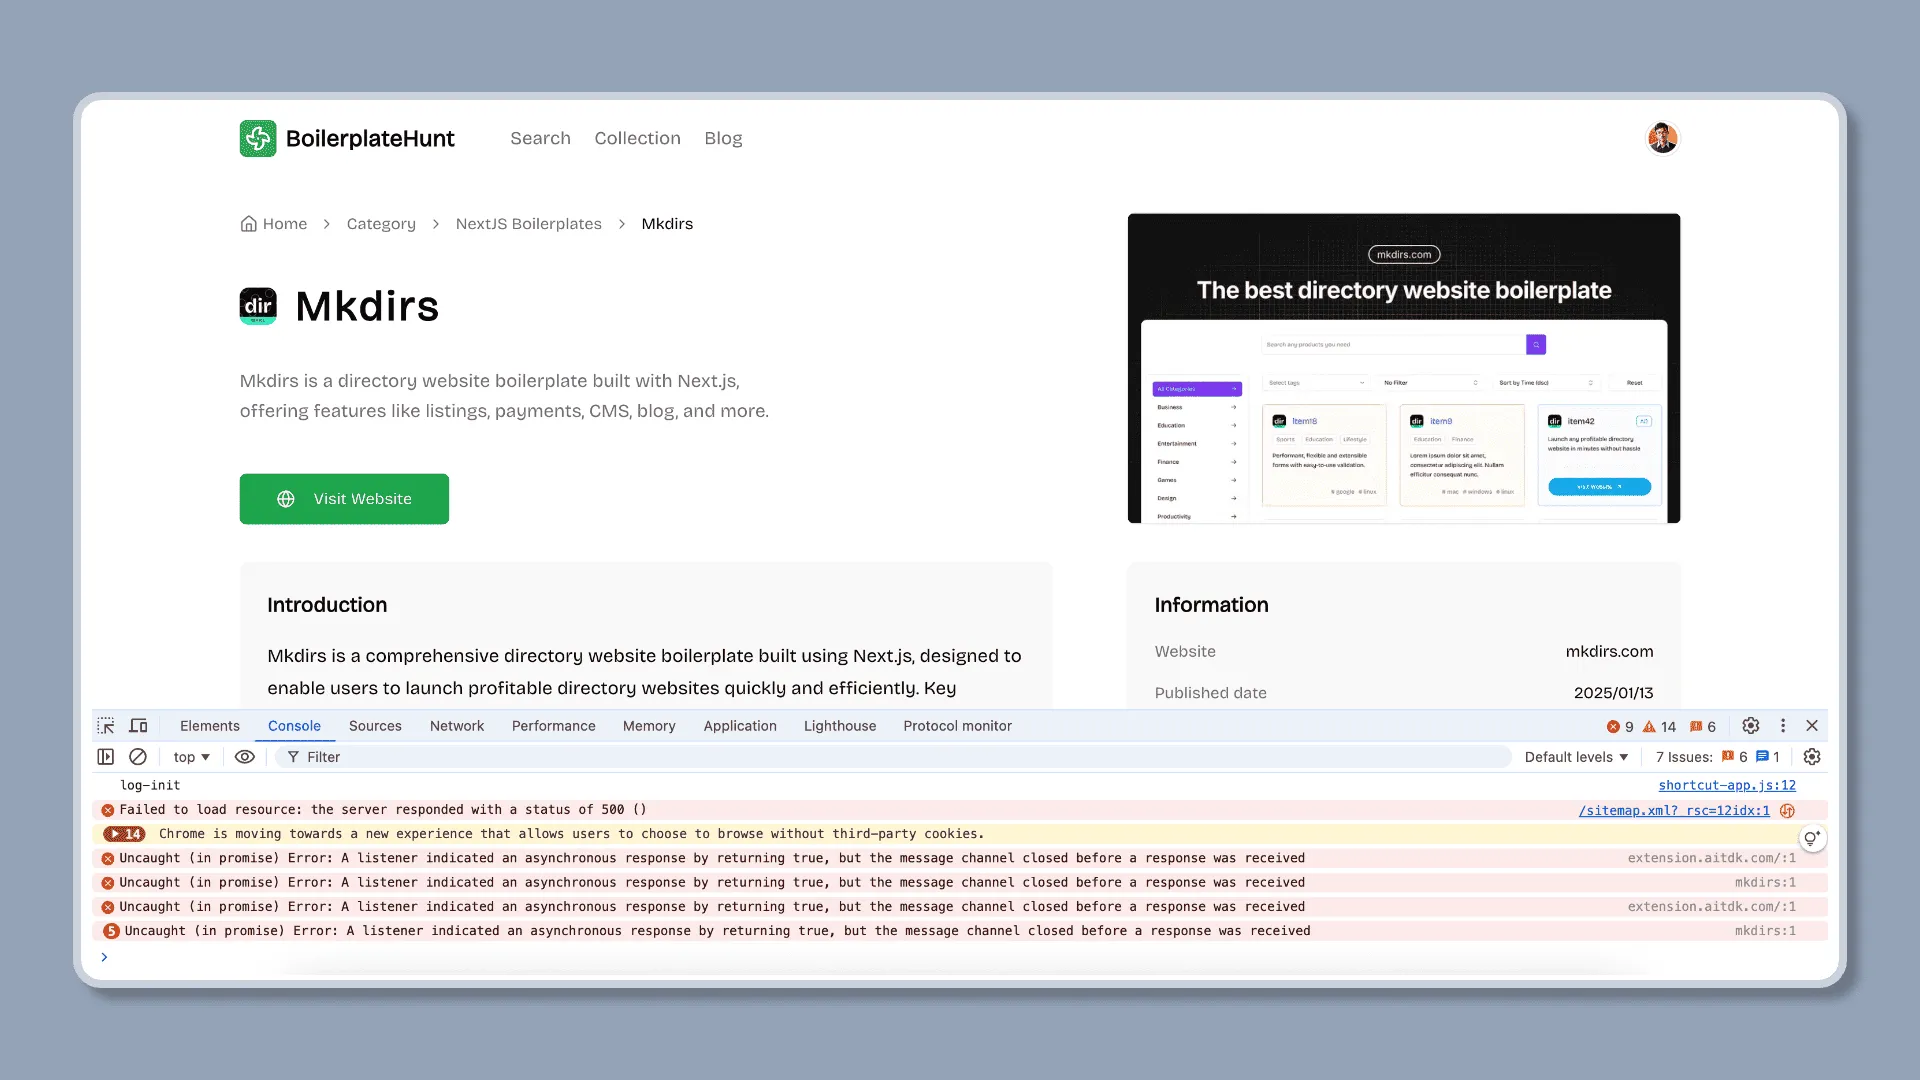
如果您遇到一些错误,您可以在浏览器的 console 中找到日志(如果它是客户端错误),或者在服务器的 terminal 中找到日志(如果它是服务器错误)。
如果您使用 Vercel 部署您的网站,您可以在 Vercel 仪表板中的 Logs 部分找到日志。
浏览器控制台日志
Vercel 日志

如何批量导入数据
Mkdirs 使用 Sanity 作为内容管理系统,因此如果你想要批量导入数据,那么你需要将数据导入到 Sanity,导入之前建议您先阅读 Sanity 文档 中提供的资料了解 Sanity 的基本概念和用法。
如果你已经熟悉了 Sanity,那么你可以参考项目根目录下的 scripts 目录下的脚本,实现批量导入分类、标签和元素。
默认情况下,项目根目录下的 scripts 目录下有 batch-group.ts、batch-category.ts、 batch-tag.ts 和 batch-item.ts 四个脚本,分别用于导入分类组、分类、标签和元素。
你可以在新建项目之后,通过执行命令 pnpm batch 来测试导入数据,脚本目录下还提供了其他脚本,您可以参考它们实现自己的需求,对应命令请参考 package.json 文件中的 scripts 部分。
"scripts": { "dev": "next dev", "build": "next build", "start": "next start", "lint": "next lint", "typegen": "sanity schema extract && sanity typegen generate", "email": "email dev --dir emails --port 3333", "export-user-emails": "tsx scripts/export-user-emails.ts", "microlink:fetch": "tsx scripts/explore-microlink.ts fetch", "microlink:insights": "tsx scripts/explore-microlink.ts insights", "microlink:screenshot": "tsx scripts/explore-microlink.ts screenshot", "microlink:fullpage": "tsx scripts/explore-microlink.ts fullpage", "aisdk:fetch": "tsx scripts/explore-aisdk.ts fetch", "aisdk:structure": "tsx scripts/explore-aisdk.ts structure", "item:remove": "tsx scripts/batch-item.ts remove", "item:import": "tsx scripts/batch-item.ts import", "item:update": "tsx scripts/batch-item.ts update", "item:fetch": "tsx scripts/batch-item.ts fetch", "batch": "tsx scripts/batch-all.ts", "batch:remove": "tsx scripts/batch-all.ts remove", "batch:import": "tsx scripts/batch-all.ts import", "batch:update": "tsx scripts/batch-all.ts update"},如何格式化代码
我们使用 Biome 来格式化代码,并且已经在项目中配置好了。
您可以在 vscode 中安装 Biome 扩展 来自动格式化代码。
或者您可以运行以下命令来格式化代码:
biome format如何同步源码
如果您按照 安装 中的步骤操作,并且有一个名为 @your-github-username/your-mkdirs 的仓库。
按照以下步骤从 @MkdirsHQ/mkdirs-template 同步源码到您的仓库,例如,新功能或错误修复。
-
添加上游仓库
首先,您需要将原始仓库添加为远程仓库。
您可以将其命名为
upstream,然后在本地仓库中运行以下命令:Terminal window git remote add upstream https://github.com/MkdirsHQ/mkdirs-template.git -
获取上游仓库的更改
运行以下命令以获取原始仓库中的所有分支和提交:
Terminal window git fetch upstream -
切换到您的
main分支确保您在
main分支上(通常是main或master):Terminal window git checkout main -
合并上游更改
现在,将上游
main分支的更改合并到您的本地main分支:Terminal window git merge upstream/main --allow-unrelated-histories如果您不想合并上游
main分支的所有更改,您也可以选择性地挑选您想要应用到本地main分支的特定提交:Terminal window git cherry-pick <commit-hash>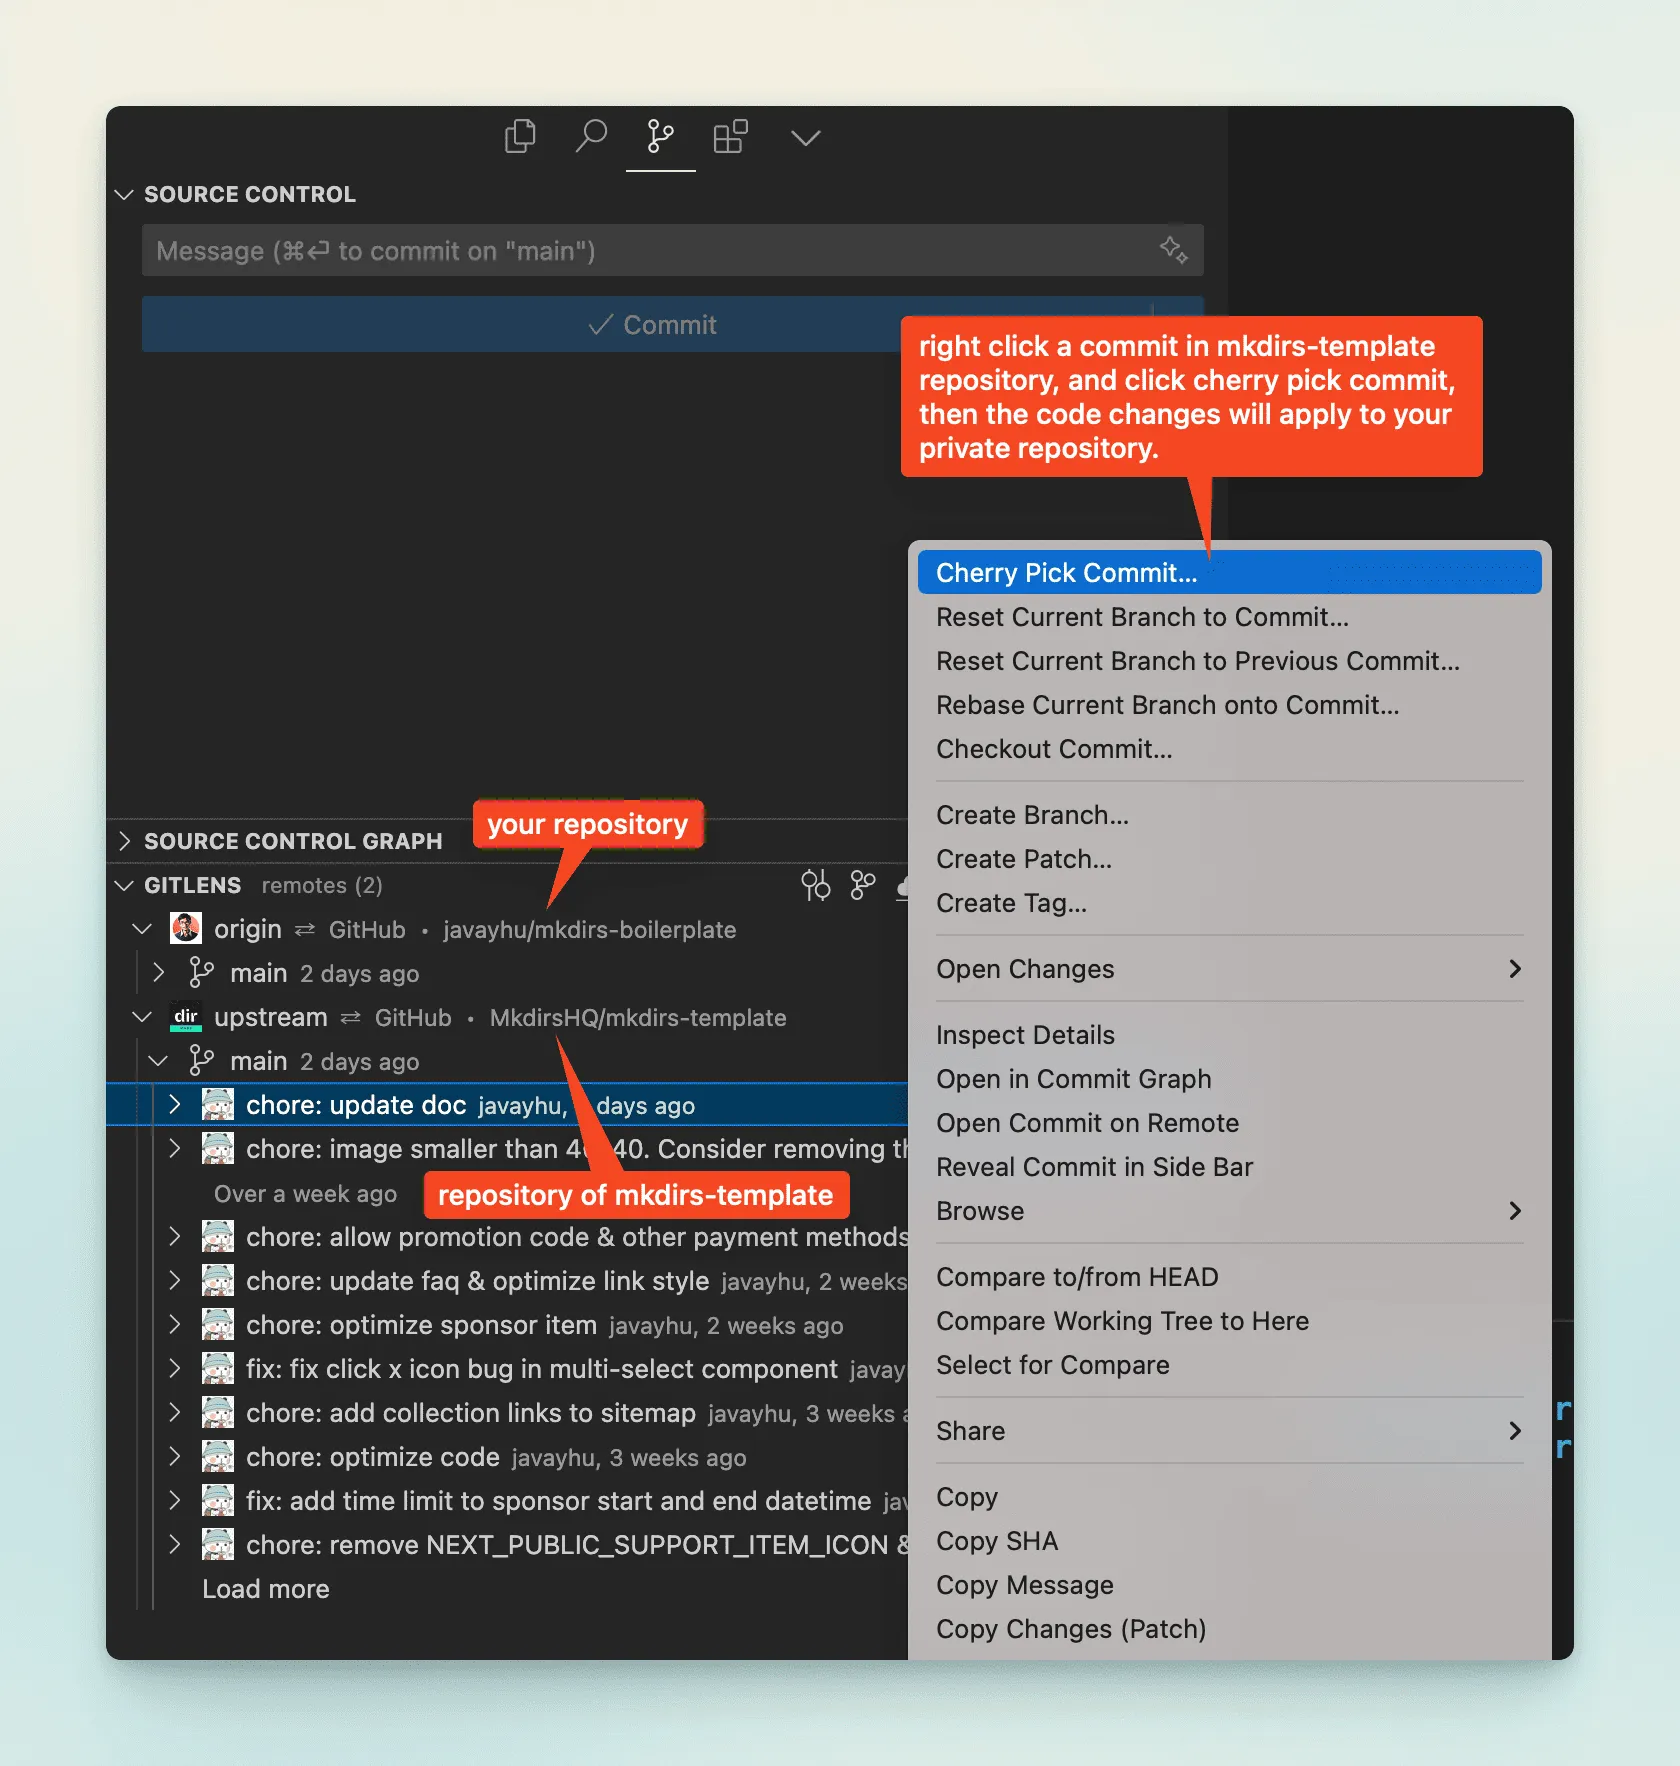
-
解决冲突(如果有)
如果在合并过程中发生冲突(主要是因为您已经对源码进行了一些更改),您需要手动解决它们。
解决冲突后,使用
git add添加修改的文件,然后使用git commit提交更改。 -
推送到您的仓库
最后,将更新后的本地
main分支推送到您自己的仓库:Terminal window git push origin main
按照这些步骤,您可以保持您的分支与原始仓库同步。建议定期执行此过程,以确保您的分支不会落后太多。