How to work with source code
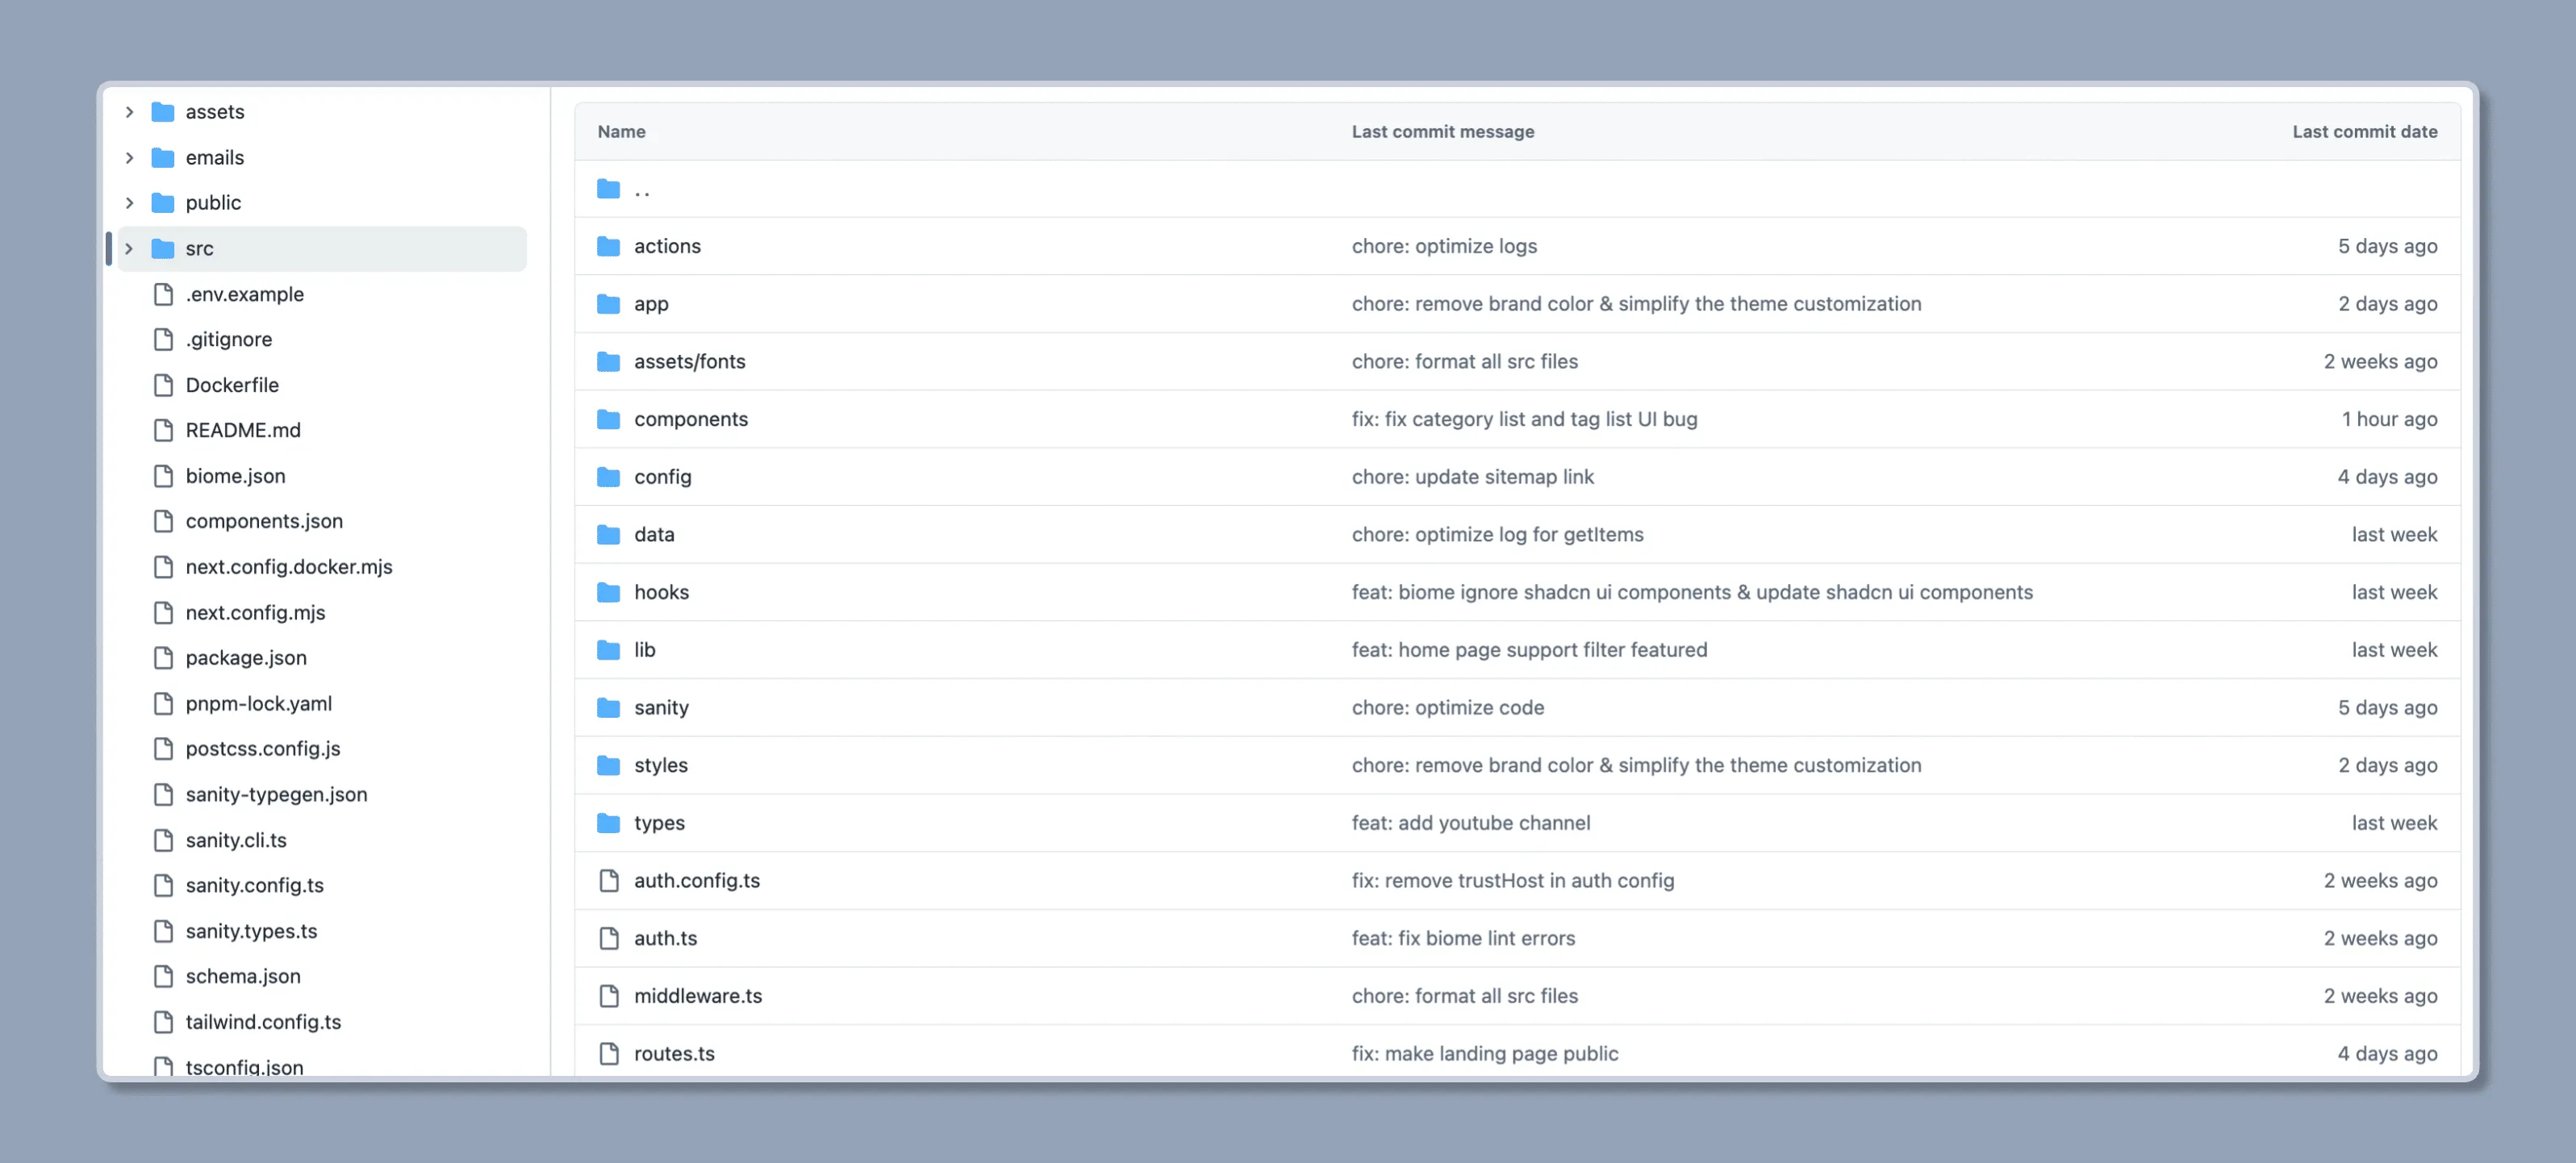
Folder Structure
It’s simply a Next.js project using Typescript, so the folder structure of the Mkdirs is as follows:
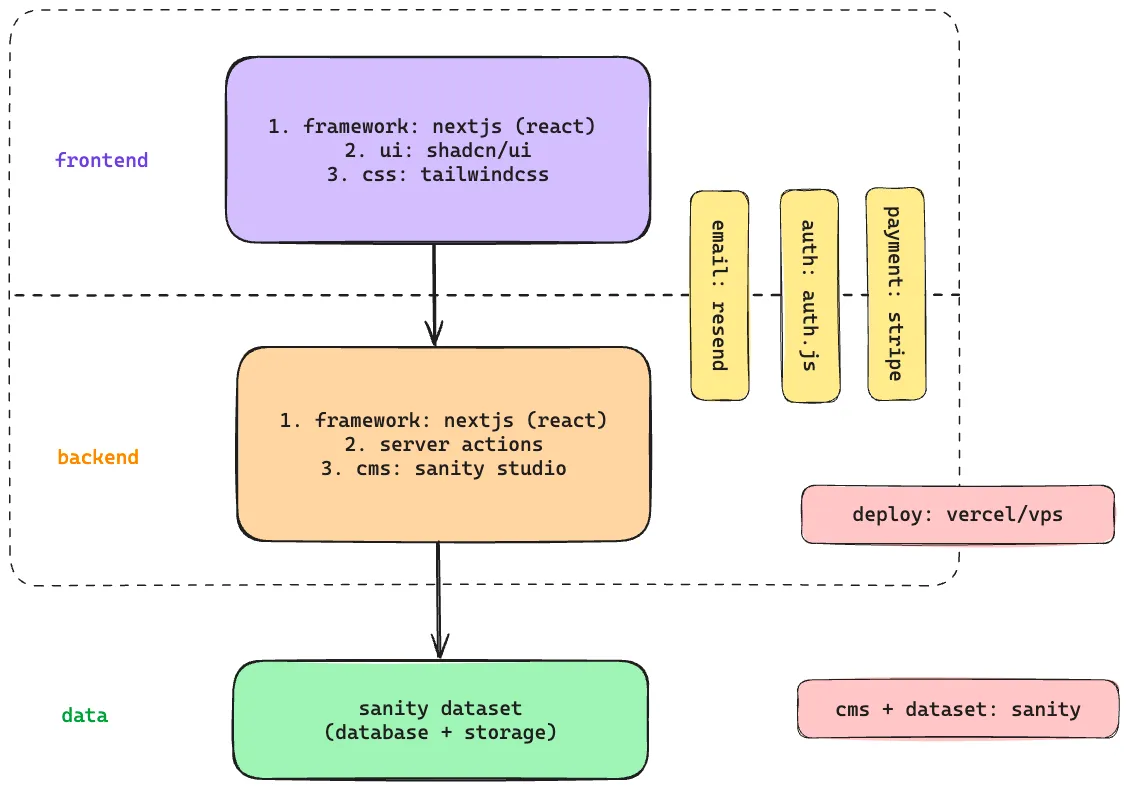
Application Architecture
How to find the logs
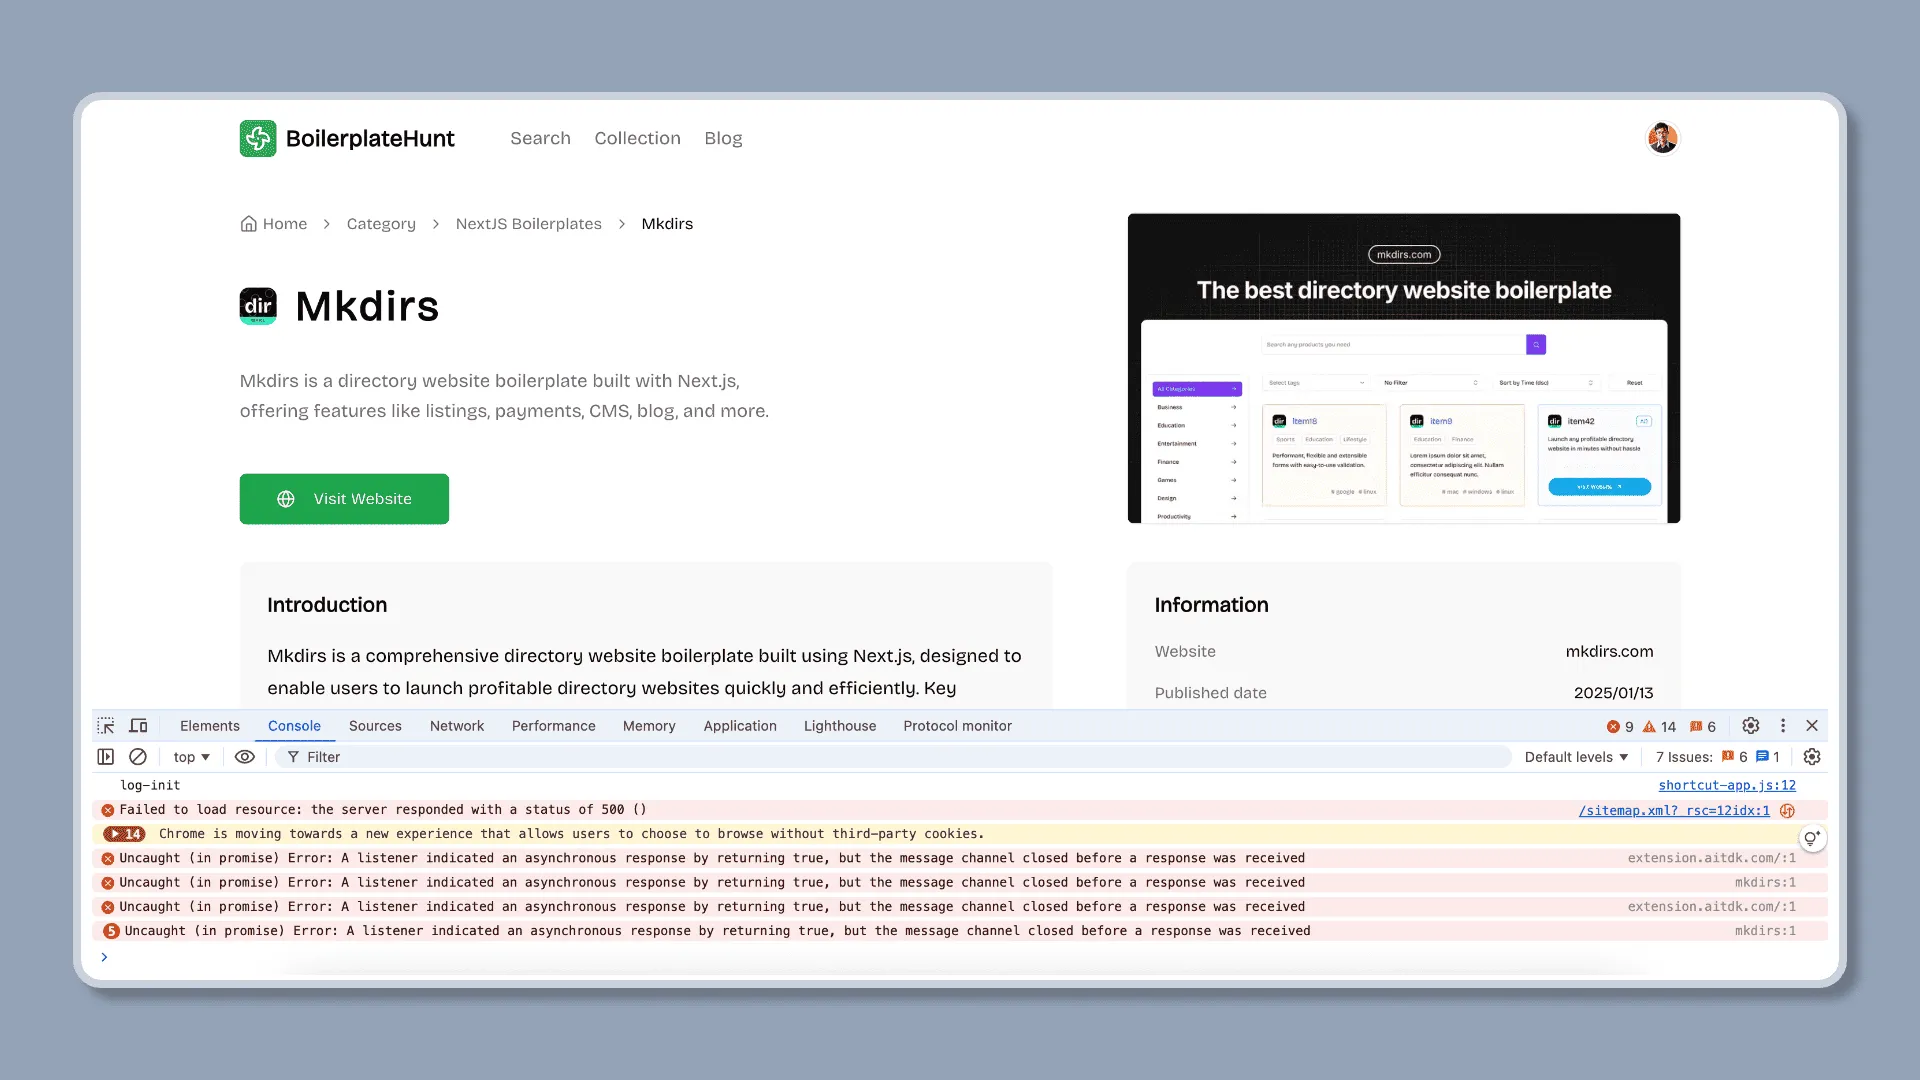
If you met with some errors, you can find the logs in the console of the browser (if it is a client error), or in the terminal of the server (if it is a server error).
If you are using Vercel to deploy your website, you can find the logs in the Logs section of the Vercel dashboard.
Console Logs
Vercel Logs

How to batch import data
Mkdirs uses Sanity as the content management system, so if you want to batch import data, you need to import the data into Sanity, and it’s recommended to read the Sanity documentation before importing the data.
If you are familiar with Sanity, you can refer to the scripts in the scripts directory in the root of the project to implement batch import of categories, tags, and items.
By default, there are four scripts in the scripts directory in the root of the project: batch-group.ts, batch-category.ts, batch-tag.ts, and batch-item.ts, which are used to import category groups, categories, tags, and items, respectively.
You can test importing data by running the command pnpm batch after creating a new project, and you can also refer to the other scripts in the directory too, the corresponding commands can be found in the package.json file.
"scripts": { "dev": "next dev", "build": "next build", "start": "next start", "lint": "next lint", "typegen": "sanity schema extract && sanity typegen generate", "email": "email dev --dir emails --port 3333", "export-user-emails": "tsx scripts/export-user-emails.ts", "microlink:fetch": "tsx scripts/explore-microlink.ts fetch", "microlink:insights": "tsx scripts/explore-microlink.ts insights", "microlink:screenshot": "tsx scripts/explore-microlink.ts screenshot", "microlink:fullpage": "tsx scripts/explore-microlink.ts fullpage", "aisdk:fetch": "tsx scripts/explore-aisdk.ts fetch", "aisdk:structure": "tsx scripts/explore-aisdk.ts structure", "item:remove": "tsx scripts/batch-item.ts remove", "item:import": "tsx scripts/batch-item.ts import", "item:update": "tsx scripts/batch-item.ts update", "item:fetch": "tsx scripts/batch-item.ts fetch", "batch": "tsx scripts/batch-all.ts", "batch:remove": "tsx scripts/batch-all.ts remove", "batch:import": "tsx scripts/batch-all.ts import", "batch:update": "tsx scripts/batch-all.ts update"},How to format the code
We use Biome to format the code, and it’s already configured in the project.
You can install the Biome extension in vscode to format the code automatically.
Or you can run the following command to format the code:
biome formatHow to sync the code
If you have followed the steps in the Installation, and you have a repository named @your-github-username/your-mkdirs.
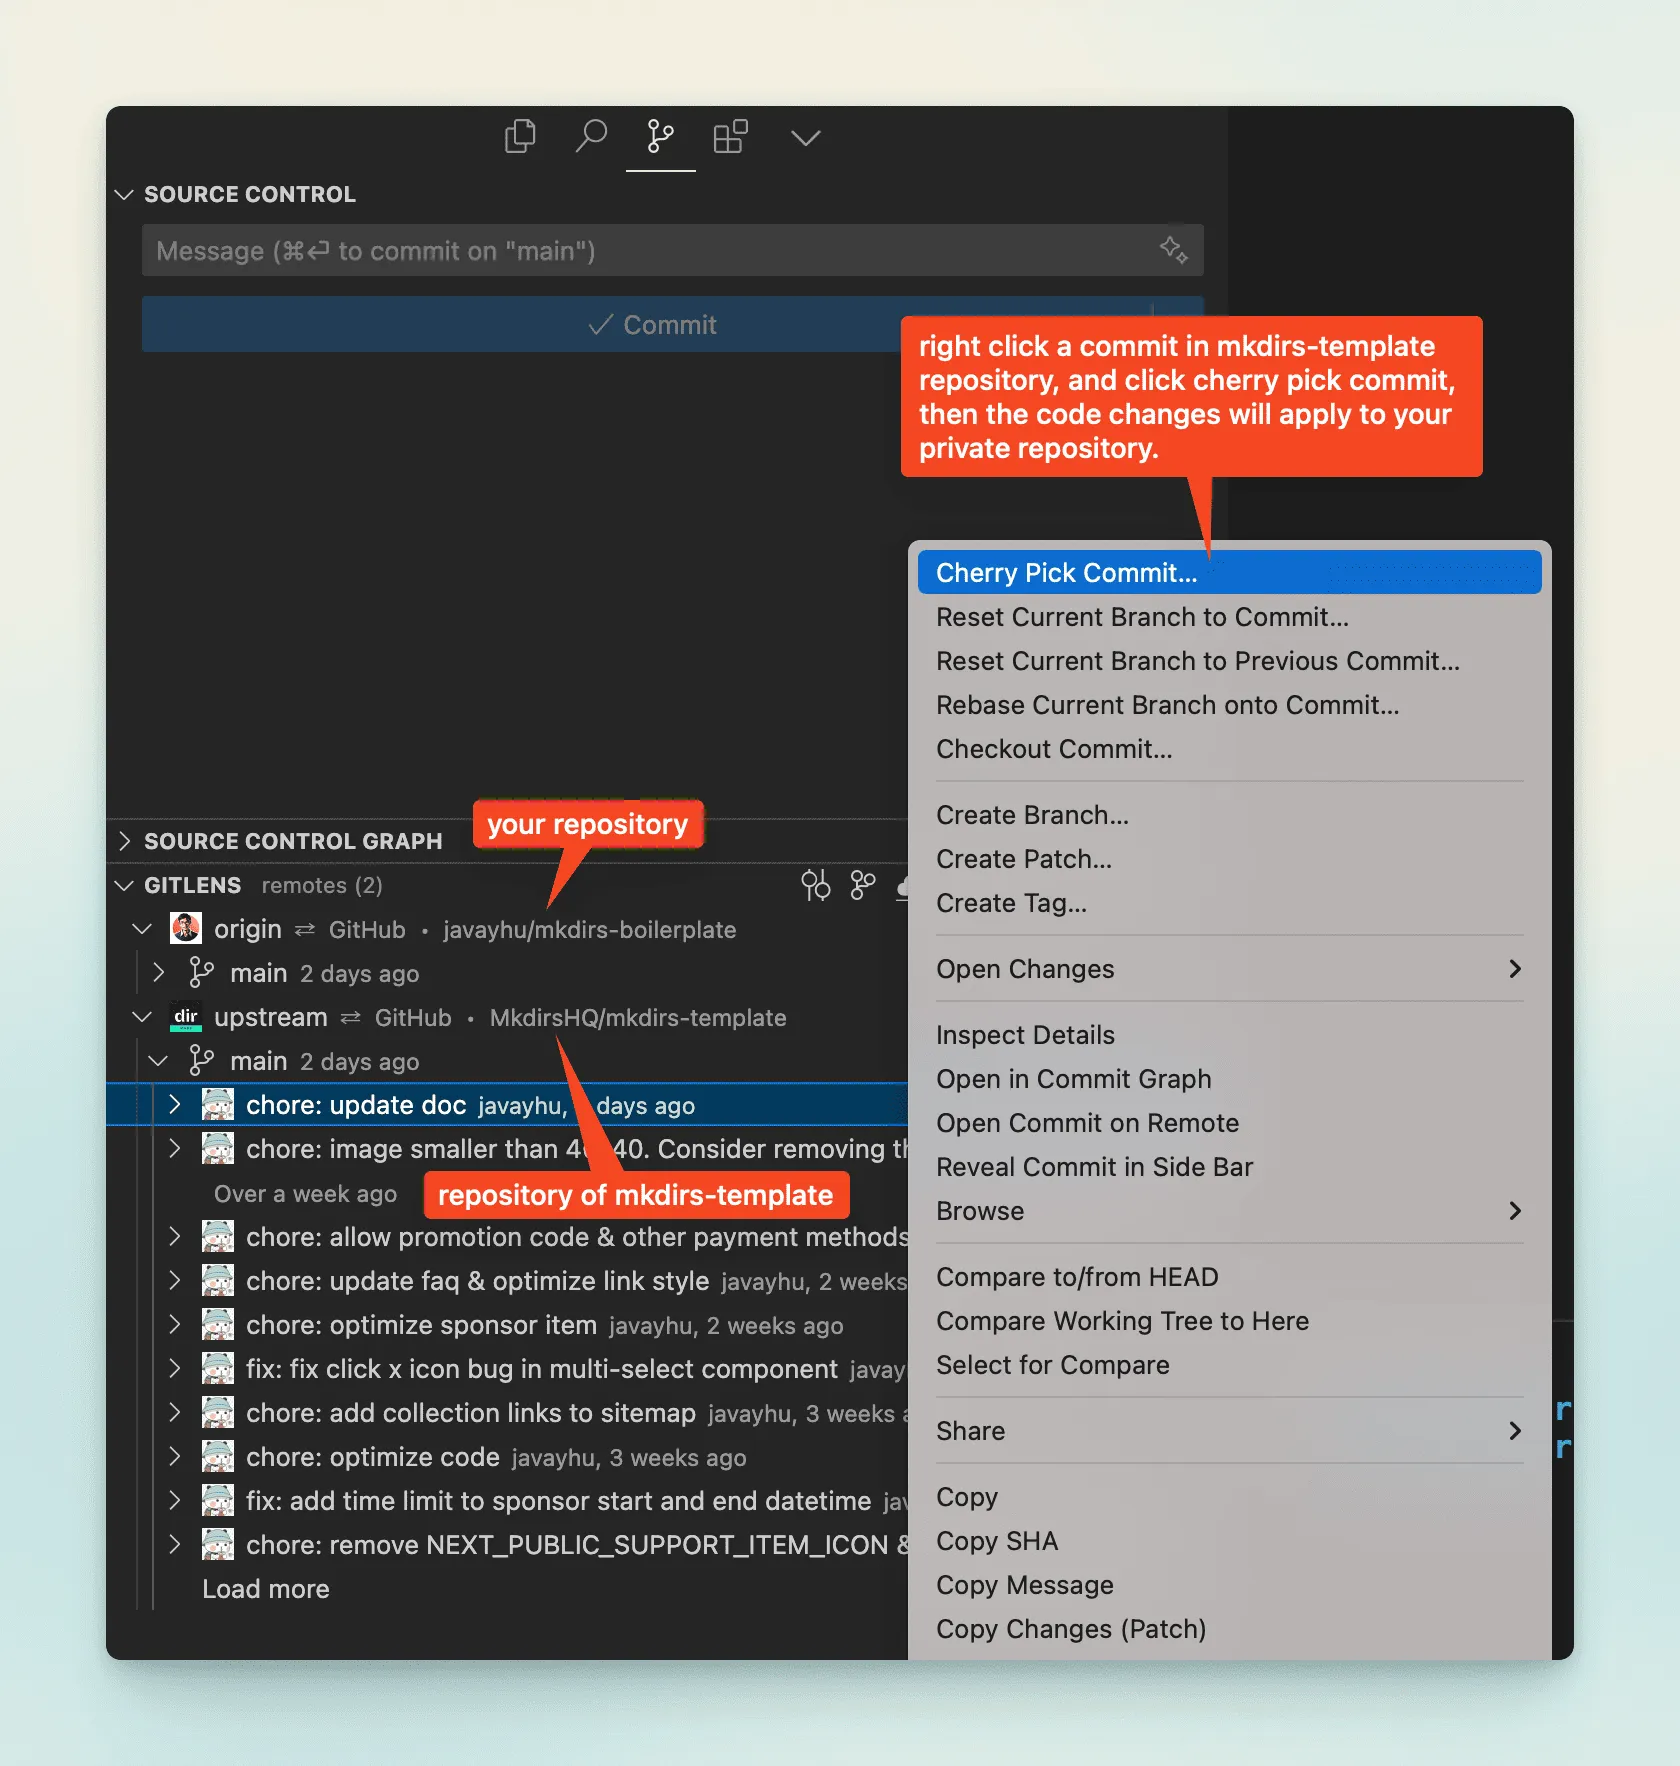
Follow the steps below to sync the source code from @MkdirsHQ/mkdirs-template to your own repository if some updates are available, for example, new features or bug fixes.
-
Add the upstream repository
First, you need to add the original repository as a remote repository.
You can name it
upstream, and run the following command in your local repository:Terminal window git remote add upstream https://github.com/MkdirsHQ/mkdirs-template.git -
Fetch upstream changes
Run the following command to fetch all branches and commits from the original repository:
Terminal window git fetch upstream -
Switch to your main branch
Make sure you’re on your main branch (usually main or master):
Terminal window git checkout main -
Merge upstream changes
Now, merge the changes from the upstream main branch into your local main branch:
Terminal window git merge upstream/main --allow-unrelated-historiesIf you don’t want to merge all the changes from the upstream main branch, you can also cherry-pick the specific commits that you want to apply to your local main branch:
Terminal window git cherry-pick <commit-hash>If you prefer to use vscode extension, you can use GitLens to sync the code.
-
Resolve conflicts (if any)
If conflicts occur during the merge (mainly due to you have made some changes to the source code already), you’ll need to resolve them manually.
After resolving, use
git addto add the modified files, then usegit committo commit the changes. -
Push to your own repository
Finally, push the updated local main branch to your own repository:
Terminal window git push origin main
By following these steps, you can keep your fork in sync with the original repository. It’s recommended to perform this process regularly to ensure your fork doesn’t fall too far behind.